In our journey toward sustainable living, creating compost bins from scratch stands out as a rewarding and eco-friendly project. Together, we’ll explore the step-by-step process of constructing our very own compost bins, using simple materials and techniques that anyone can follow. We’ll cover everything from selecting the best location and materials to assembling and maintaining our bins for optimal composting. By the end, we’ll have a perfectly functioning compost system that not only reduces waste but also enriches our gardens with nutrient-rich compost. Let’s get started on this green adventure and transform our kitchen scraps and yard waste into black gold! How do we make compost bins from scratch? It’s a question many of us ask ourselves when we strive for a greener lifestyle. Composting not only helps recycle organic waste but also improves soil health and nurtures our gardens. Let’s dive into the world of composting and explore how we can build our own compost bins from scratch.
Why Compost?
Before we roll up our sleeves, let’s understand why composting is beneficial. Composting helps turn kitchen scraps and yard waste into nutrient-rich compost that can enrich our gardens. It reduces the amount of waste we send to landfills, decreasing our ecological footprint. By composting, we contribute to a healthier planet.
Key Components of Composting
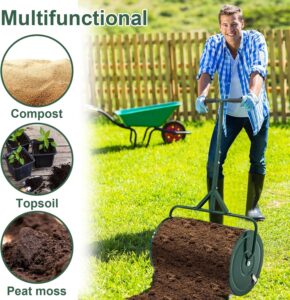
To succeed in composting, we need to balance key components: greens, browns, air, and moisture. Greens are rich in nitrogen and include items like fruit and vegetable scraps, coffee grounds, and grass clippings. Browns are rich in carbon and include materials like dry leaves, straw, and cardboard. Proper aeration and moisture levels ensure that microorganisms can efficiently break down these materials.
| Component | Examples |
|---|---|
| Greens | Fruit/vegetable scraps, coffee grounds, grass clippings |
| Browns | Dry leaves, straw, cardboard, paper |
| Air | Turning the pile, adequate spacing |
| Moisture | Sprinkling water as needed, cover to retain moisture |

Choosing the Right Spot
Location Matters
Selecting a suitable location for our compost bin is crucial. The spot should be easily accessible, preferably near our garden to allow easy transfer of compost. Ensure it’s on well-drained soil to help excess moisture escape and microbes from the ground to aid decomposition.
Sunlight and Shade
Our compost bin should ideally get a balance of sunlight and shade. Too much sun can dry out the compost, while too much shade can slow down the decomposition process. A spot with partial shade is perfect.
Materials for Building the Bin
Creating a compost bin from scratch requires using the right materials. We can repurpose items we already have at home or purchase the necessary components. Typical materials include wood, pallets, wire mesh, plastic, and metal.
Wood
Wooden bins are sturdy and can be built to any size. Using untreated wood is crucial to avoid adding chemicals to our compost. Recycled pallets are an excellent source of wood for this project.
Wire Mesh
Wire mesh or hardware cloth can be useful for creating bins or adding aeration to our wooden bins. It’s an affordable option that can be shaped as needed.
Plastic
Plastic bins are durable and resistant to weather conditions. Using recycled plastic barrels or bins is an environmentally friendly option.
Metal
Metal bins are robust and can last longer. However, they can be prone to rust, especially if not treated properly. We should consider this when choosing our materials.
How Do I Make Compost Bins From Scratch?

Tools Needed
To build our compost bin, we’ll need some basic tools:
- Hammer
- Nails or screws
- Screwdriver
- Saw (for cutting wood)
- Measuring tape
- Level
- Drill (optional, for faster assembly)
Design Options
Single Bin
A single bin is the simplest design and suitable for beginners. It’s a basic container where we can throw all our compostable materials. This design is compact and requires minimal space.
Multi-Bin System
A more advanced option is a multi-bin system, allowing us to manage multiple stages of compost at once. We can have three bins – one for fresh waste, one for the compost in progress, and one for finished compost. This system helps in maintaining an organized composting process.
Tumbler Bin
A tumbler bin is another efficient option, especially if we’re tight on space. It consists of a rotating barrel mounted on a frame, enabling us to mix the compost easily by turning the barrel.

Step-by-Step Guide to Building a Compost Bin
Let’s break down the process of building a compost bin from scratch. We’ll focus on constructing a basic wooden bin using wooden pallets, a common and cost-effective choice.
1. Gather Materials
We’ll need the following materials for a basic wooden pallet compost bin:
- 4 wooden pallets (same size)
- Nails or screws
- Wire mesh (optional, for aeration)
- Hinges (optional, for creating a lid)
2. Prepare the Pallets
Inspect the pallets to ensure they’re in good condition. Remove any nails or staples that could cause injury or hinder construction. If necessary, cut the pallets to the desired size using a saw.
3. Construct the Frame
Stand two pallets upright to form the back and one side of the bin. Secure them together using nails or screws. Repeat with the other pallets to complete the bin’s frame. Ensure the construction is sturdy.
4. Attach the Front and Back
Add a front to the bin by attaching the fourth pallet. Leave a small gap between the slats for airflow. We can also add a removable front panel to make turning the compost easier.
5. Finish Up
(Optional) Attach wire mesh to the sides and bottom of the bin to enhance aeration. (Optional) Build and attach a lid using hinges. This will help keep pests out and retain moisture.
6. Place the Bin
Place the bin in the designated spot in our yard. Ensure it’s level and stable. Consider adding a layer of coarse materials like twigs at the bottom to help with drainage and airflow.
Starting the Composting Process
Now that our bin is ready, it’s time to start composting! Let’s explore the steps to create nutrient-rich compost.
1. Add Layers
Begin by adding a layer of coarse materials like twigs or straw at the bottom. This helps with airflow. Alternate layers of greens and browns to maintain a balanced compost pile.
| Layer | Material Type | Example Items |
|---|---|---|
| Bottom | Coarse | Twigs, straw |
| Next | Greens | Fruit and vegetable scraps, coffee grounds |
| Next | Browns | Dry leaves, cardboard, paper |
| Repeat | Alternate | Alternate greens and browns |
2. Maintain Moisture
The compost pile should be as damp as a wrung-out sponge. Add water if it becomes too dry, or cover it during heavy rains to prevent it from getting too wet.
3. Turn the Pile
Aerate the compost by turning it with a pitchfork or shovel every few weeks. This helps speed up the decomposition process and prevents odors.
4. Monitor Temperature
Compost should heat up as materials decompose. Use a compost thermometer to check the temperature. It should ideally stay between 135°F and 160°F (57°C to 71°C) to kill off weed seeds and pathogens.
5. Let It Mature
Allow the compost to mature for several months. It’s ready to use when it’s dark, crumbly, and has an earthy smell.

Troubleshooting Common Issues
Odor Problems
If the compost pile smells bad, it may be due to a lack of air or too much moisture. Turn the pile and add dry materials like straw or shredded paper to absorb excess moisture.
Slow Decomposition
If the pile isn’t breaking down, it might lack sufficient greens or be too dry. Check the balance and moisture level, and turn the pile to boost aeration.
Pests
To deter pests, avoid adding meat, dairy, or oily foods. Ensure the compost bin is securely covered and consider using wire mesh to seal any gaps.
Using Our Compost
Once our compost is ready, we can use it in various ways to benefit our garden.
Soil Amendment
Mix compost into garden beds to improve soil structure, fertility, and moisture retention. It’s a natural, organic fertilizer that promotes healthy plant growth.
Mulch
Spread a layer of compost around trees, shrubs, and plants as mulch. It helps retain soil moisture, suppress weeds, and slowly release nutrients.
Potting Mix
Blend compost with soil and other materials to create a nutritious potting mix for container plants. This will provide plants with the necessary nutrients for strong growth.
Lawn Top Dressing
Top dress our lawn with compost to enhance soil quality and promote lush, green grass. Apply a thin layer over the lawn and rake it in evenly.
Benefits of DIY Compost Bins
Cost-Effective
Building our compost bin from scratch can be more affordable than purchasing a ready-made one. We can use recycled materials, saving money and reducing waste.
Customizable
By constructing our own compost bin, we can tailor it to our needs and available space. We have complete control over its size, design, and features.
Environmental Impact
Creating our own compost bin encourages us to recycle organic materials, reducing our reliance on landfills. It promotes sustainability and helps us contribute to a healthier environment.
Gardening Benefits
Using homemade compost enhances soil health, encouraging robust plant growth. It reduces the need for chemical fertilizers, providing a natural alternative that’s beneficial for both plants and the soil.
Conclusion
Making a compost bin from scratch isn’t just a rewarding project; it’s a step towards a more sustainable lifestyle. By understanding the basics of composting and following a simple plan, we can create a functional bin that transforms waste into valuable compost. Let’s embrace the process, enrich our gardens, and make a positive impact on the environment together. Happy composting!