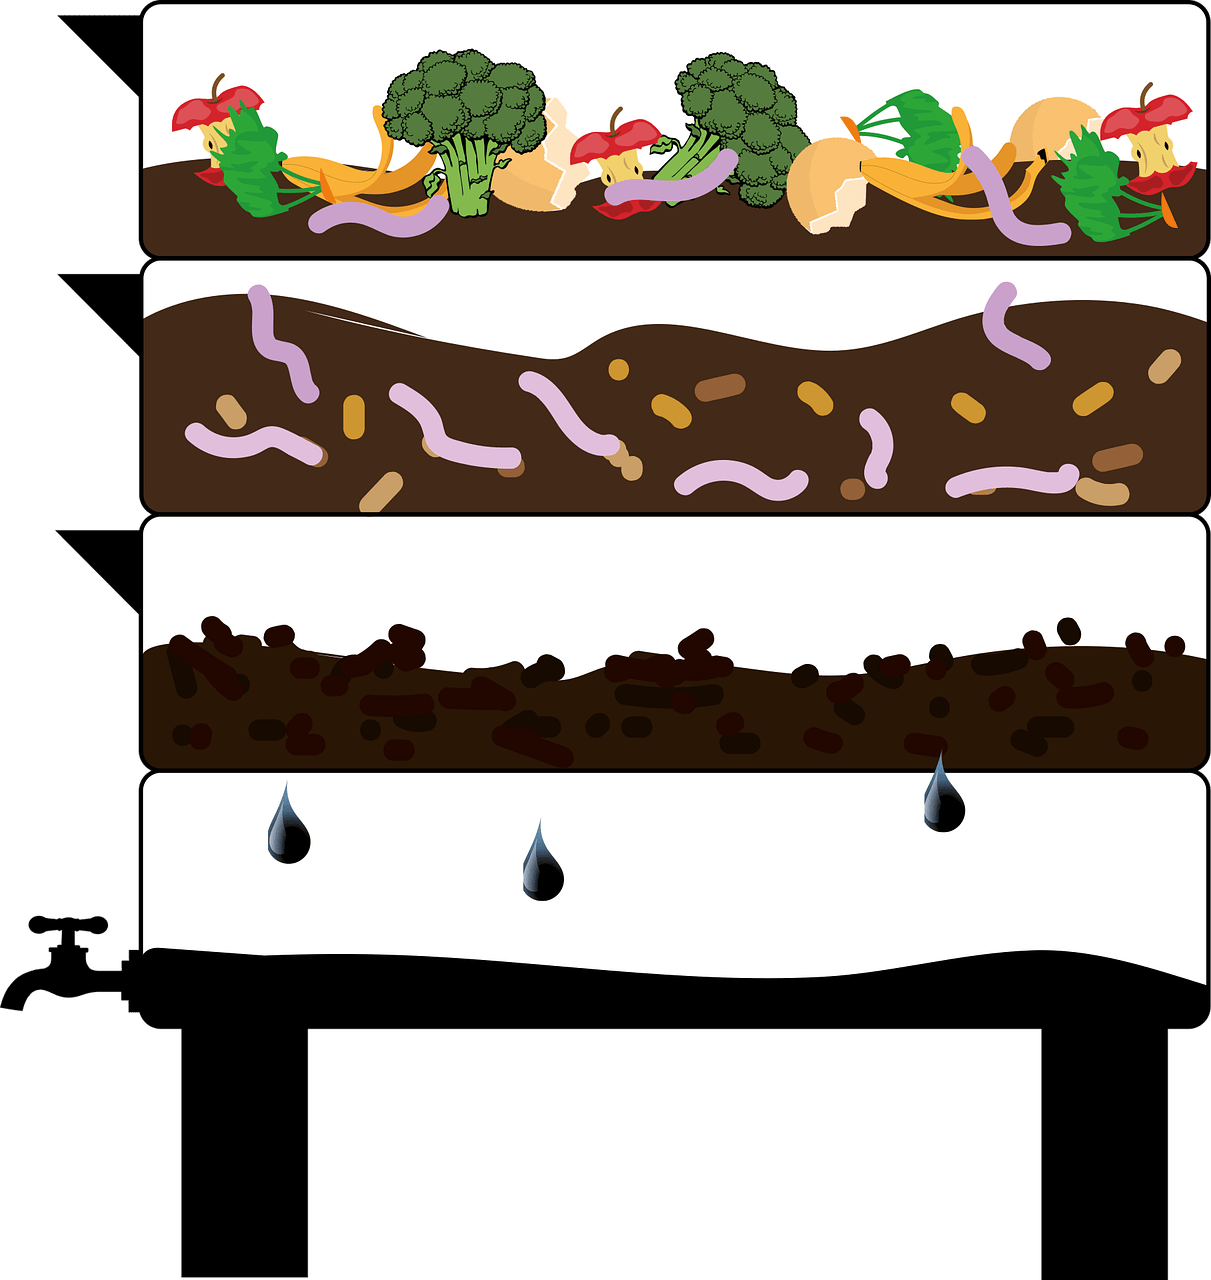
Welcome to our beginner’s guide on worm composting! In “How Do I Start A Worm Composting Bin?”, we explore the essentials of setting up a home for our wriggly friends who can turn kitchen scraps into nutrient-rich compost. Together, we’ll uncover the materials we need, the steps to prepare our bin, and the tips to keep our worms happy and productive. Whether we’re seasoned gardeners or just starting our journey into sustainability, this guide will empower us to make the most of our organic waste and contribute to a greener planet, one worm at a time! How Do I Start A Worm Composting Bin?
Are you looking to reduce kitchen waste while producing rich organic fertilizer for your garden? If so, you might be wondering, “How do I start a worm composting bin?” You’ve come to the right place. Whether you’re a gardening aficionado or someone with a keen interest in sustainable living, setting up a worm composting bin can be rewarding for multiple reasons.

Why Consider Worm Composting?
Before diving into the “how-to,” let’s explore why worm composting, also known as vermicomposting, is worth your time and effort. Vermicomposting involves the breakdown of organic material by worms, resulting in nutrient-rich compost that can be highly beneficial for your plants. Additionally, it’s an eco-friendly way to recycle kitchen scraps, helping reduce waste and conserve landfill space.
Environmental Benefits
As a community, we can reduce our carbon footprint by adopting more sustainable practices. Worm composting helps divert organic waste from landfills, thereby reducing methane emissions, a potent greenhouse gas.
Gardening Benefits
If we’re looking to boost our garden’s productivity, worm composting can be our secret weapon. The compost produced, often referred to as “worm castings,” is rich in essential nutrients and beneficial microorganisms. This enhances soil structure, improves water retention, and promotes healthier plant growth.
Materials Needed
Starting a worm composting bin is simpler than we might think. Let’s go over the essential materials we’ll need:
| Item | Purpose |
|---|---|
| Worm Bin | Housing for the worms |
| Red Wigglers (Eisenia fetida) | The worms that will do the composting work |
| Bedding Material | Creates a hospitable environment for the worms |
| Food Scraps | What the worms will eat |
| Moisture Source | Keeps the bin at an ideal moisture level |
| pH Meter (optional) | To monitor acidity levels |
Let’s break down these items for better understanding.
Worm Bin
Choosing the right container is crucial. We can either purchase a commercially-made worm bin or make one ourselves using a plastic or wooden container. The bin should be appropriately sized based on how much waste we intend to compost.
Red Wigglers
The red wiggler worms are the star performers in our vermicomposting setup. They thrive in a compost bin environment and can process organic material rapidly. We can usually purchase these worms from gardening stores or online retailers.
Bedding Material
The bedding material helps create a comfortable environment for our worms. Common bedding options include shredded newspaper, cardboard, or coconut coir. The bedding should be moist but not soaking wet.
Food Scraps
Worms aren’t particularly picky eaters, but some foods are better suited for compost bins. Ideal food scraps include fruit and vegetable peels, coffee grounds, and eggshells. Avoid meat, dairy, and oily foods as they can create odors and attract pests.
Moisture Source
Maintaining the right level of moisture is essential for the well-being of our worms. The bedding should be damp, similar to a wrung-out sponge. If it feels too dry, we can sprinkle some water, and if it’s too wet, we can add more dry bedding.
pH Meter (Optional)
While not strictly necessary, a pH meter can help us monitor the acidity of our bin. Ideal conditions are slightly acidic to neutral (pH 6-7).
Setting Up the Worm Bin
With our materials ready, it’s time to set up our worm composting bin.
Selecting a Location
First, we need to choose a suitable location for our bin. Ideally, we should pick a spot that is dark, cool, and has good ventilation. Avoid areas exposed to direct sunlight or extreme temperatures.
Preparing the Bin
If we’re making our own bin, we need to drill ventilation holes. Drill small holes (1/8 to 1/4 inch) on the sides and lid of the bin to ensure proper airflow. This helps prevent bad odors and ensures the worms have sufficient oxygen.
Adding Bedding
Next, we’ll layer the bottom of our bin with moist bedding material. Shredded newspaper or cardboard works great. We should aim for a bedding depth of about 4 to 6 inches. Before adding the bedding, soak it in water, then wring it out to achieve the desired moisture level.
Introducing the Worms
Now comes the exciting part—introducing our red wigglers to their new home! Spread them evenly over the bedding material. Give them some time to acclimate before adding the food scraps.
Adding Food
Once our worms have settled in, it’s time to feed them. Start with small amounts of food scraps, gradually increasing as the worms get used to their new environment. Bury the scraps under the bedding to help minimize any odors and discourage fruit flies.
Managing the Worm Bin
Maintaining our worm composting bin is relatively easy, but it does require some regular attention. Let’s look at a few key aspects of managing the bin.
Feeding Schedule
We should aim to feed our worms every 3-4 days. Observing our worms’ behavior and the state of the bin will inform us how much to feed them. If the food scraps are disappearing rapidly, we can increase the amount slightly. If scraps remain, reduce the quantity.
Moisture Level
Keeping the bedding at the right moisture level is vital. Check the bin every few days and adjust as needed. Remember, the goal is a damp, sponge-like consistency.
Temperature
Worms are sensitive to temperature extremes. The ideal temperature range for red wigglers is between 55-77°F (13-25°C). If temperatures are outside this range, take steps to warm or cool the bin accordingly.
Harvesting Vermicompost
In about 3-6 months, our worms will have transformed a significant amount of bedding and food scraps into dark, crumbly compost. This is the perfect time to harvest.
To do this, we can try the “dump and sort” method, where we dump the contents of the bin onto a tarp and sort through to separate the worms from the compost. Alternatively, we can move the bin contents to one side, add fresh bedding and food to the empty side, and wait for the worms to migrate over.

Troubleshooting Common Issues
Even with the best intentions, we might encounter some challenges along the way. Here are a few common issues and how to resolve them.
Bad Odors
A properly maintained worm bin should have a mild, earthy smell. If we notice strong, unpleasant odors, it’s usually a sign of an issue, such as:
- Too Much Food: Overfeeding can lead to rotting food.
- Lack of Airflow: Ensure ventilation holes are not blocked.
- Excess Moisture: Add dry bedding to absorb excess water.
Fruit Flies
Fruit flies can be attracted to our bin if food scraps are too exposed. To prevent this, always cover food scraps with a layer of bedding. Using a fine mesh cover can also help.
Escaping Worms
If we notice worms trying to escape, it often indicates that something is off in the bin environment. Common reasons include:
- Improper pH Levels: Test the pH and adjust if necessary.
- Temperature Issues: Ensure the bin is within the ideal temperature range.
- Bedding Problems: Make sure the bedding is moist but not waterlogged.
Scaling Up or Down
Our composting needs may change over time. If we find we’re producing more kitchen waste than our current bin can handle, we might want to scale up. Conversely, if we’re producing less waste, scaling down might be more appropriate.
Expanding the Bin
If we decide to expand, we can either create additional bins or upgrade to a larger bin. More bins offer the advantage of easier management and flexibility.
Downsizing
If we need to downsize, we can adjust by reducing the amount of food we’re feeding the worms and possibly transferring some of our worms to another compost bin or sharing with friends and neighbors.

Conclusion
Starting a worm composting bin is a fantastic way to recycle kitchen scraps into nutrient-rich compost, all while reducing our environmental footprint. By setting up a bin and maintaining it with the right balance of food, moisture, and temperature, we can enjoy the numerous benefits vermicomposting offers. So why wait? Let’s start our worm composting journey today and contribute to a more sustainable world, one bin at a time!


